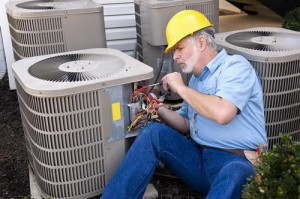
Imagine you’re outside on a hot 90-something degree summer day, so hot that you can fry an egg on the sidewalk. What if you had to wear a sweater on this sweltering hot day.
In a sense, that’s how your air conditioner feels when it’s not maintained. Caked up dust and debris on the condensing cabinet or air conditioning unit is like wearing a sweater on a hot summer day. The sweater would prevent your body from releasing heat, just like dirt would prevent the air conditioner from adequately cooling your home. The dust and debris chokes the airflow, preventing the unit to breathe.
Green America Home Inspections strives to provide you with some helpful tips on home maintenance. Today we focus on how to keep your HVAC system running smoothly and properly this summer; because no one wants to wear sweaters in the summertime.
Step 1 – Getting Started
TURN OFF THE POWER. There should be a service shutoff switch close to the unit. Due to the dangers of working around electricity and the air-conditioner’s moving parts, it’s essential to completely turn off power before beginning. Once the power is turned off it is safe to start removing debris (leaves, twigs, etc) from inside the cabinet. When working on the outside unit, you must remove the cabinet cover. Using a screwdriver, remove the fasteners and lift the cage or fan grill away from the top of the unit
Prevent debris buildup. Cut back tree branches and other vegetation at least 2 feet in all directions to ensure proper airflow around the unit. During winter months when the condenser is not in use, it’s good to partially cover the top of the unit with a piece of plywood or plastic to keep debris from falling in. Remove the cover when the unit is operating. If you have a heat pump you will not want to cover the unit.
Step 2 – Check the fins
With a strong stream from a garden hose, spray through the fins from the inside out to blast any built up dirt or debris from between them. Carefully straighten bent fins using a butter knife or commercially available fin-straightening tool to improve airflow and increase efficiency.
Step 3 – Level the Unit
Refrigerant needs to be able to flow through the coils evenly without too much interference from the slope of the unit. A level concrete slab works best. An out-of-level condenser unit can cause the compressor to malfunction and prematurely fail.
Step 4 – More Cleaning
Now we can move inside the house to perform maintenance on the inside unit or air handler. The furnace and air conditioner uses the same evaporator coils and air filter. We will now evaluate the unit and check out the condensate drain and the air filter. Two commonly overlooked items that can cause some major repairs. The drain is usually a PVC pipe or a clear tube. Once located, use a wet/dry vacuum to clear the drainage, turn on the vacuum for 2-3 minutes then turn back off. You may need to use tape to create a good seal around the pipe and the vacuum hose. This will clear the drain of any growing mold or algae. Lastly, make sure to change the air filter at least twice a year – once just before the heating season begins and once before the cooling season begin. Sometimes quarterly, depending on the indoor air quality of the home. If the filter is really dirty after 3 months consider changing as frequently as monthly.
Step 5 – Turn it on and relax!
While these steps are useful and easy enough that any do-it-yourselfer can handle, the bottom line is that it’s still necessary to have an expert technician check the system periodically. These tips can save you some money and buy you more time in between service calls.


Along with these DIY tips, you should also make sure to get the unit regularly inspected by a professional. That way, they can make sure everything is running how it should. If there is a problem, it will hopefully be spotted before it turns into something bigger. So, between your DIY maintenance and professional help, your unit should be running smoothly!
Thats completely correct! Thanks for that insight Kendall 🙂